You can check your hard drive health for free using your computer’s built-in tools like Windows CHKDSK terminal command, macOS Disk Utility (S.M.A.R.T. Status), or the Linux Terminal FSCK. Routinely checking hardware-reported health logs is the best way to protect your personal files and prevent further damage to the drive before it happens.
This verified guide gives a safe and expert-tested walkthrough to check the health of both modern SSDs and traditional external hard drives on Windows, macOS, and Linux.
Follow these simple step-by-step methods to understand how to check hard drive health on your system.
How to Check Hard Drive Health on Windows?
As a Windows user, checking hard drive health regularly prevents sudden data loss and catches hardware failure before your system crashes. You can quickly inspect your storage using built-in Windows features like Command Prompt and system settings without downloading any external software. Additionally, most hard drive providers have dedicated software for HDD/SSD health checks.
This section is dedicated to Windows users confused about how to check hard drive health, whether your PC is lagging, or if you want to verify whether your data is safe or not.
Using Command Prompt
The most direct way to check hard drive health is using Windows Command Prompt. You can directly communicate with the system, bypassing any complex menu. Since this is a command-line tool, there is no graphical user interface with buttons or links.
This Command Prompt can be used in two ways: first, checking the drive’s hardware-reported SMART status, and second, running the CHKDSK tool to scan and repair bad sectors.
The Windows SMART Status Check
The Windows SMART Status Check is a built-in hardware diagnostic tool. It predicts hard drive failure before it happens. SMART stands for Self-Monitoring, Analysis, and Reporting Technology. This automated system tracks temperature and read errors. In Command Prompt, you can run it to get a fast pass-or-fail health report.
Steps to follow for hard drive / SSD health check on Windows:
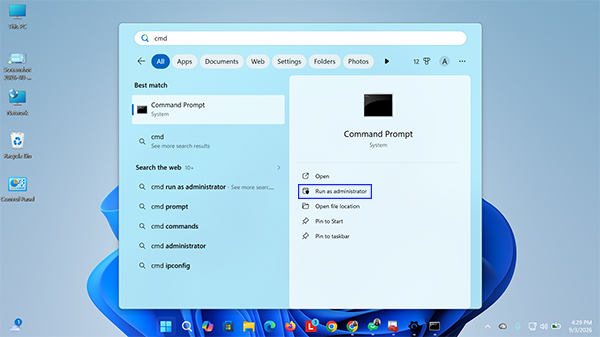
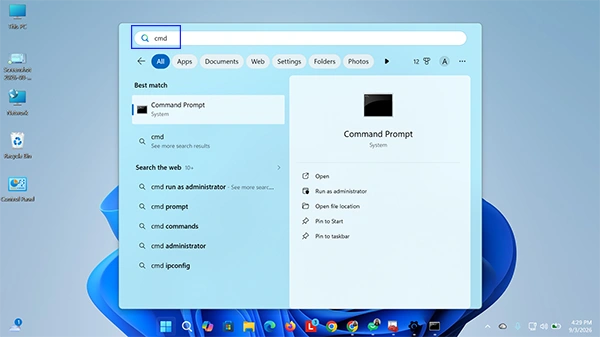
Press the Windows key and search for CMD. Click Run as administrator to open Command Prompt with admin access.
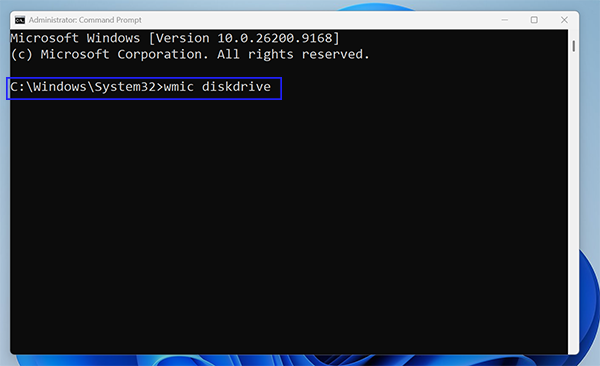
Type the following command for an SSD or hard drive health check, then press Enter.
wmic diskdrive
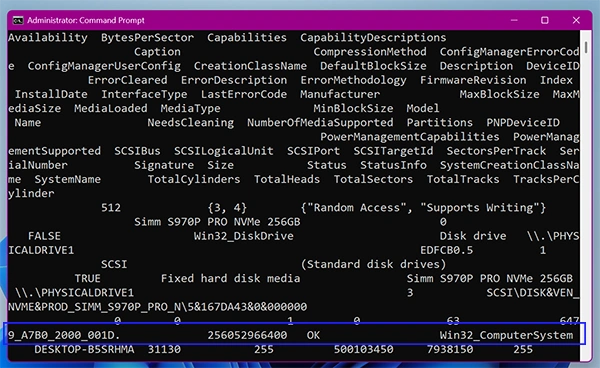
Read the Status column in the output:
OK: Your hard drive is performing normally.
Pred Fail: Your drive is failing. Back up your data immediately.
Scanning and Fixing the Drive Using CHKDSK
The Windows CHKDSK (Check Disk) tool is a powerful feature that actively scans your hard drive to find and fix file system errors. The SMART status checks for hardware failure, and CHKDSK targets software corruption and logical glitches that cause system crashes and missing files that might appear as hard drive failure. So, running this command-line scanner makes Windows look more closely at the drive’s surface and repair damaged sectors, isolating the unreadable bad sectors.
Press the Windows key on the keyboard and type cmd in the search bar.
Select Command Prompt and click Run as Administrator next to it.
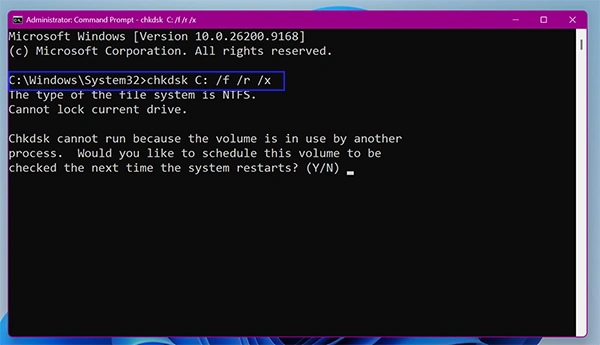
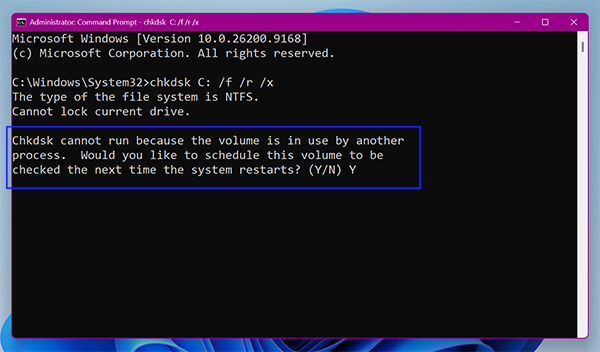
Type the following command in the Command Prompt window to perform a standard check and automatic fix, and press Enter:
chkdsk C: /f /r /x
(Replace C: with your specific drive letter if you are testing an external or secondary drive)
/f: Fixes errors on the disk
/r: Locates bad sectors and tries to fix them.
/x: Forces the partition to dismount itself.
Note: Add /b to clear the list of bad sectors and rescan all allocated and free space clusters for errors.
This will check your drive thoroughly and show errors if any. If you are running CHKDSK on the primary SSD, you will be prompted to schedule the scan for the next restart; press Y and hit Enter.
Restart your PC to let the tool scan and repair the drive during boot-up.
Using Windows Error Checking Tool
The Windows Error Checking tool is a built-in graphical tool that lets you scan and repair hard drive errors without typing any command-line code. It is a user-friendly visual version of the CHKDSK tool.
Here’s how to check hard drive health using the Windows error checking tool:
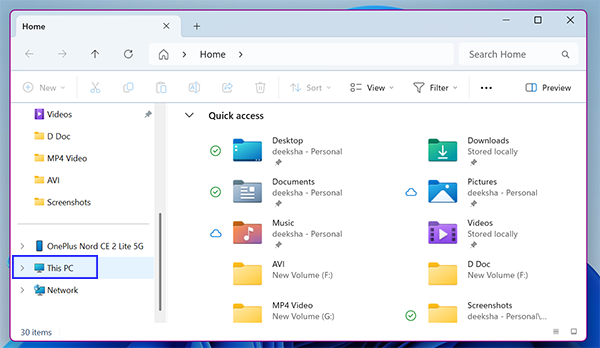
Open File Explorer by clicking the File icon on the Taskbar or pressing the Windows key + E.
From the left navigation panel, click on This PC.
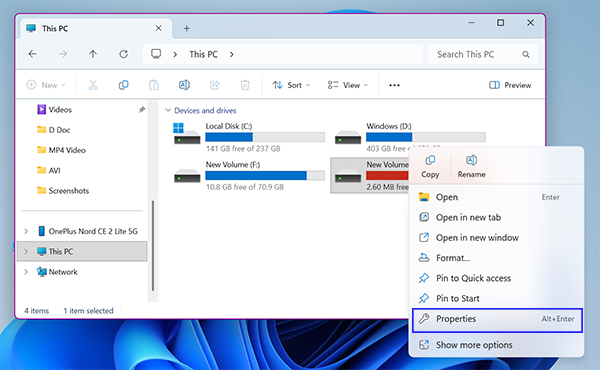
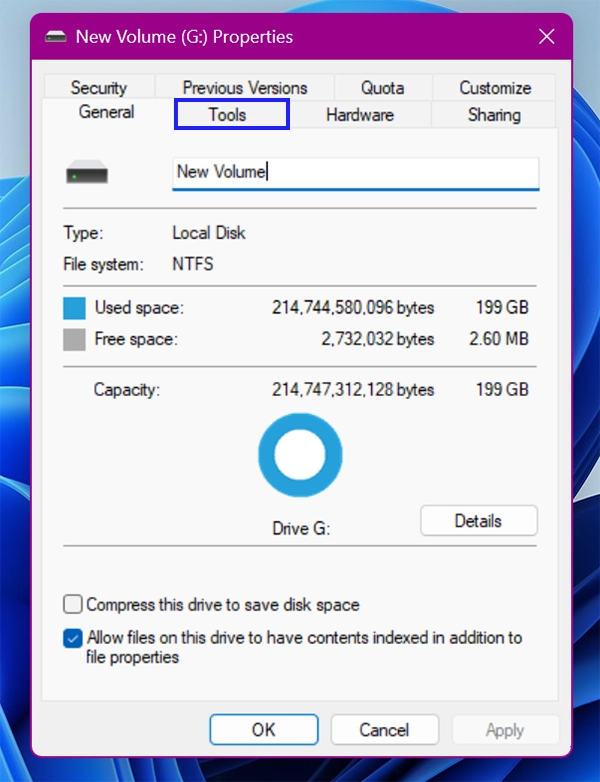
Right-click the hard drive/SSD (example: Local Disk C:) you want to check and select Properties.
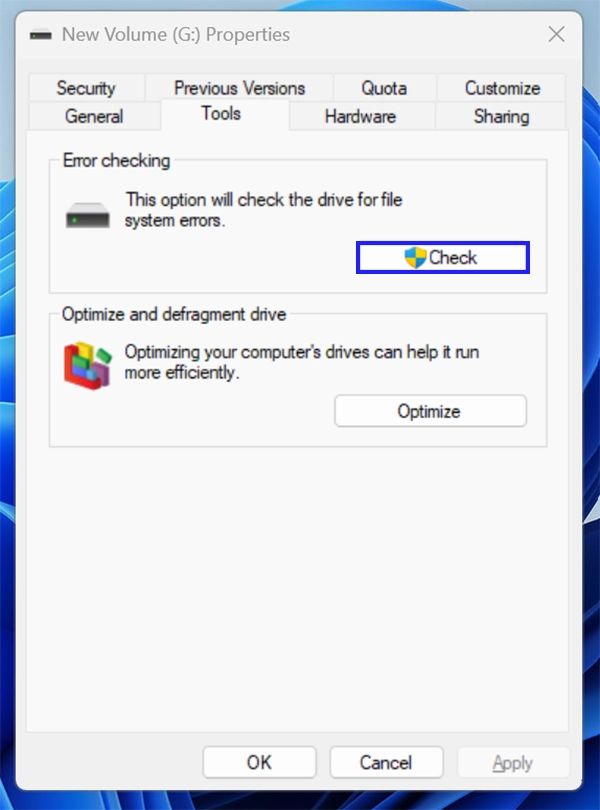
In the Properties window, go to the Tools tab.
Click the Check button under the Error Checking section.
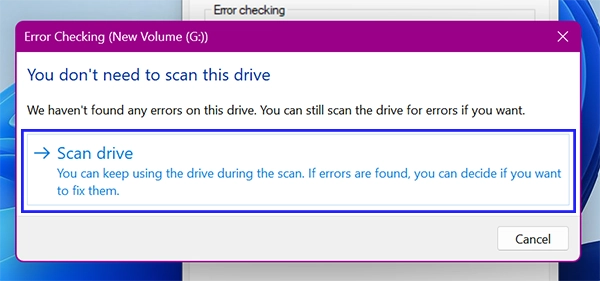
Click Start drive. Windows will now begin the scan to perform an SSD health check and will prompt warnings or issues (if any).
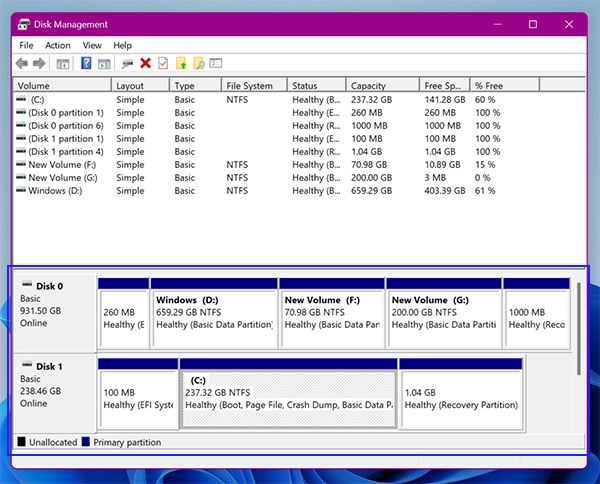
Note: If you cannot find your drive in File Manager due to any corruption or system issue, try accessing it from Disk Management.
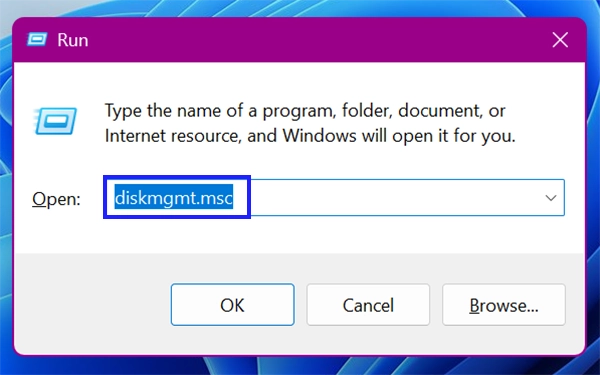
Press Windows Key + R to launch the Run dialog box.
Type diskmgmt.msc and press Enter to open Disk Management in Windows.
Locate the disk you want to check. If you can’t find the drive letter, try recognizing the drive using the disk size mentioned and follow the same steps.
Using PowerShell
Windows provides another advanced command-line interface that provides in-depth drive health status. The above-mentioned tools like Command Prompt offer basic pass-or-fail statuses; PowerShell goes directly into modern storage APIs to get exact drive characteristics. Using this method, you get to read your hard drive’s hardware type, operational status, and overall system health score using a single command.
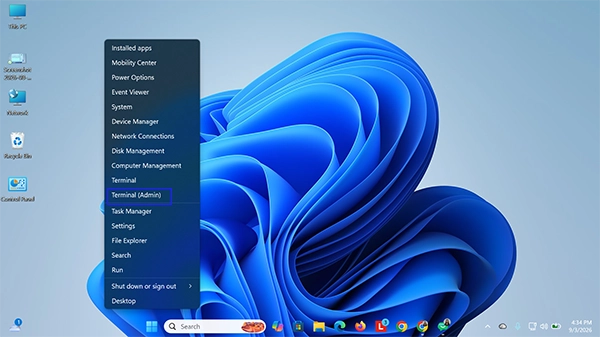
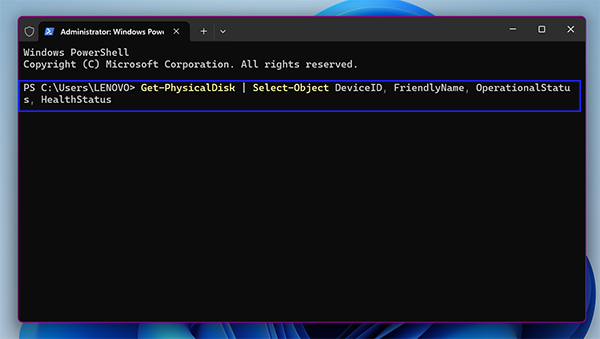
Right-click on the Windows Start icon in the taskbar and select Terminal (Admin) to open PowerShell.
Type the following command to get the list of all operational disks and their current state, and press Enter.
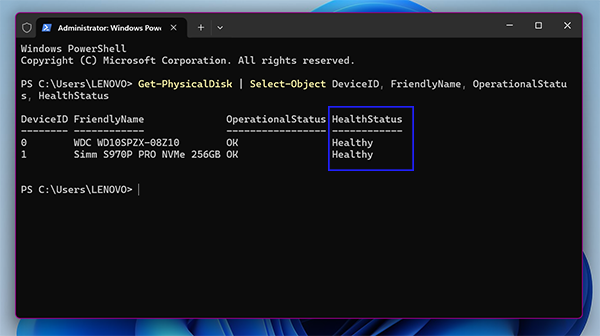
In the output, check the HealthStatus column of the target drive.
Output:
Healthy/ OK: Your drive is working perfectly fine
Warning/ Unhealthy: There is a problem with your drive.
Using the HDD Manufacturer’s Tool
You can check your specific hard drive health using the manufacturer’s tool because many hard drive manufacturers embed their own diagnostic tools within their devices. Since these tools are designed to analyse the hard drives of that specific brand, they will give you the most accurate results after an HDD/SSD health check. For this, you must know your drive manufacturer. Follow these steps:
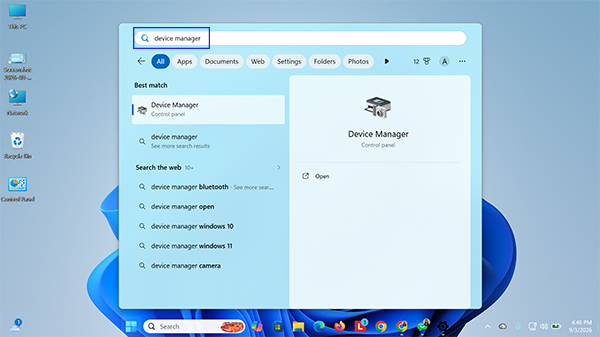
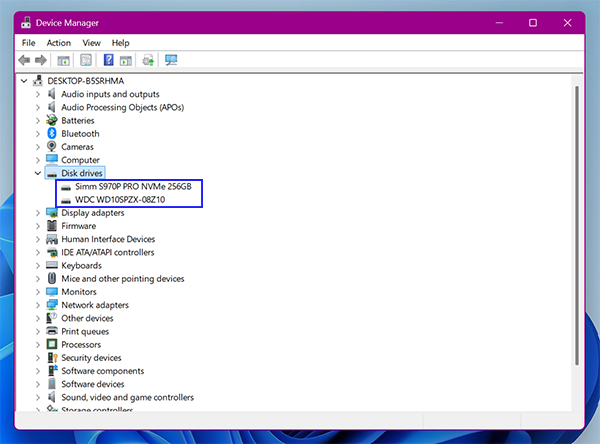
In the Start menu, search for Device Manager. Double click on it to open.
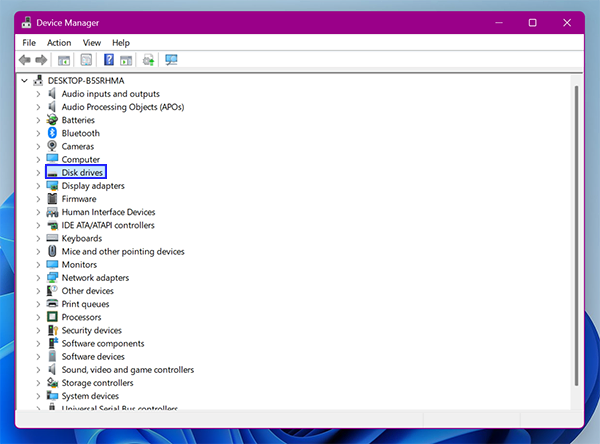
Click on Disk drives to expand the list of drives connected to the computer.
From the list, locate your drive.
Download and install the manufacturer’s tool. Check the drive health details about your specific drive in that.
Insights: According to Backblaze A1 2026 Drive Stats, monitoring over 341,000 active hard drives gives a consistent annualized failure rate between 1.24% and 1.39%. This proves that no matter what hard drive you use, there’s always a certainty of a drive’s health degradation, making routine drive health checks essential.
How to Check Hard Drive Health on Mac?
Whether your Mac uses a modern Solid-State Drive (SSD) or an older spinning hard disk, macOS provides built-in diagnostic tools that let you check your drive’s condition internally. Regularly monitoring your storage helps you catch hidden file system corruption and faults before they lead to permanent data loss. This section covers how to check hard drive health using native macOS utilities like Disk Utility and Terminal.
Using Disk Utility
The macOS Disk Utility provides an easy way to check drive health. It is a graphical application designed to manage, diagnose, and even repair storage drives by themselves. You can assess your drive’s stability without using complex terminal scripts.
You may use Disk Utility to check SMART status to see if it is physically failing or run the First Aid tool to scan and repair any corruption issues within the drive.
Checking the SMART Status
Every Mac has a built-in health monitor that watches your hard drive for internal damage. Checking your Mac’s SMART status lets you see this health report instantly. Because modern Macs have their storage glued directly onto the main computer board, you cannot easily swap out a broken drive. So, checking drive health status gives you early warnings to save your data before any emergencies.
How to check SSD health SMART status on macOS:
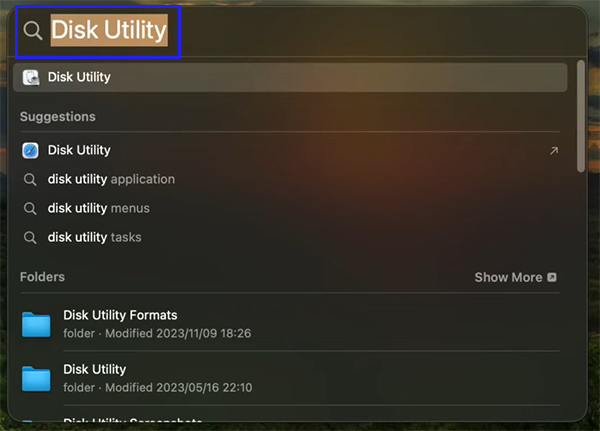
Press Command + Spacebar and search for Disk Utility, or go to Applications > Utilities > Disk Utility.
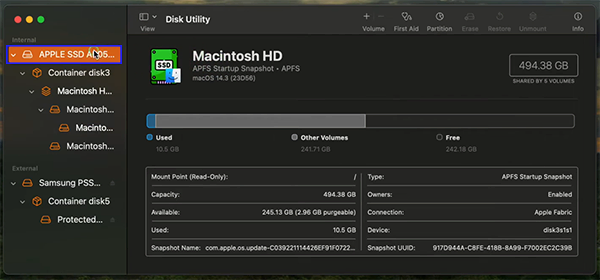
From the left-hand sidebar, select your internal/external drive to check hard drive health.
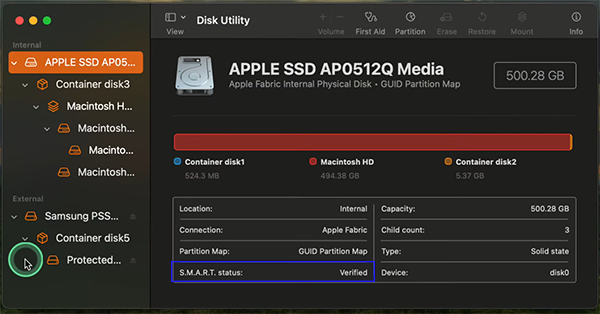
Look for the S.M.A.R.T. Status at the bottom of the window. Make sure it reads “Verified.” This means your drive is perfectly healthy.
Verified: Your drive is healthy and working perfectly.
Failing: Your drive is broken. Move your files to an external backup drive immediately.
Running First Aid
Mac First Aid is a Disk Utility feature that scans the drive to check and fix hidden errors on your drive. Over time, saving files, restarts, system updates, etc. can cause minor glitches in your Mac’s storage system. Running First Aid cleans up these messy files and stops your Mac from freezing or running slowly.
Steps for SSD health check on Mac using First Aid:
Open the Disk Utility app on your Mac.
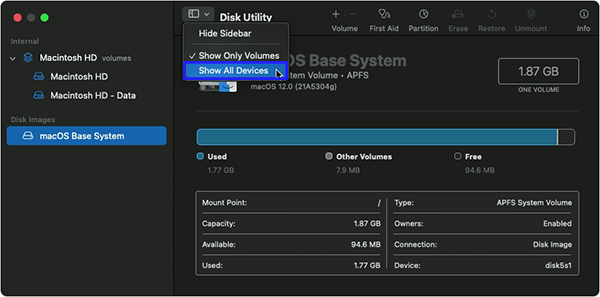
Click on View and select Show All Devices so that all your connected drives are shown.
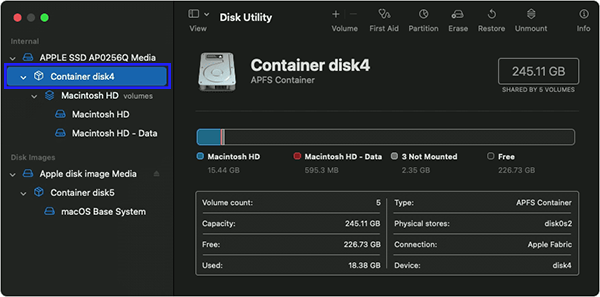
From the left sidebar, select the drive you want to check.
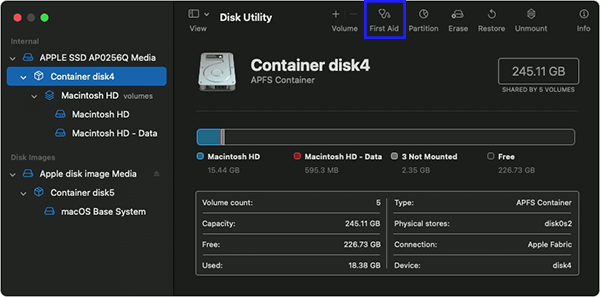
Click on the First Aid icon on the top right of the window. This will prompt a scan that will diagnose and fix your drive’s minor issues.
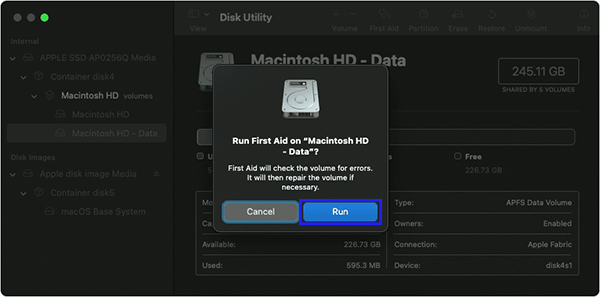
In the First Aid dialog box, click the Run button to begin the scan.
If the scan finds no errors, your drive is healthy. But if the First Aid scan shows errors that it cannot repair (such as an “overlapped extent allocation”), you should back up your data immediately and seek professional help.
Mac Terminal Method (Advanced)
If you prefer using a quick command-line shortcut over navigating menus, the Mac Terminal is a great option. It lets you skip the Disk Utility application entirely and communicate with Mac’s storage diagnostic system. This method is perfect for advanced users who want fast execution of their hard drive or SSD health check.
Steps to perform an SSD health check via Mac Terminal:
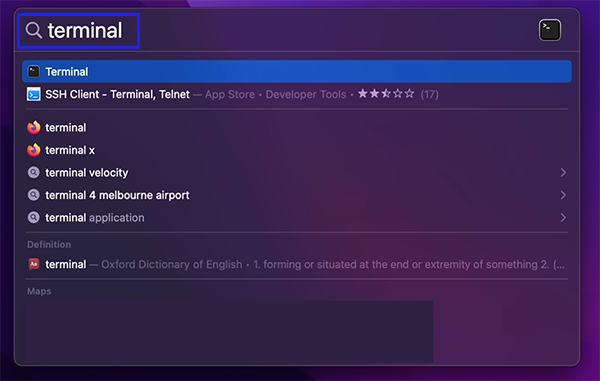
Press Command + Spacebar and search for Terminal, or go to Applications > Utilities > Terminal.
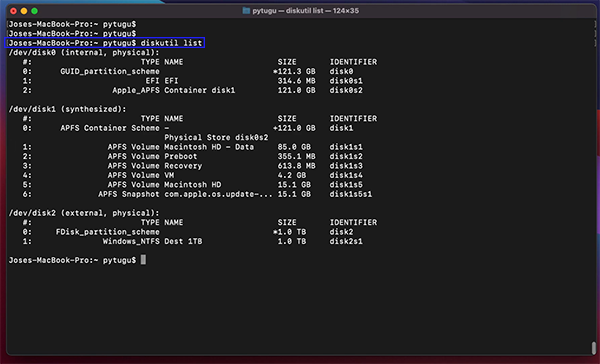
Type the following command to list all the disks and press Return:
diskutil list
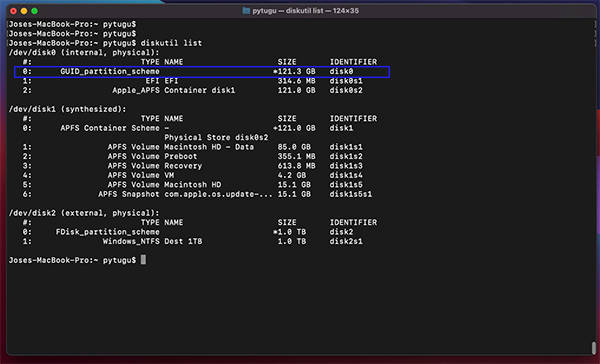
Next, enter the following command to see the disk details and health status (replace disk0 with the identifier of your respective drive):
diskutil info disk0
Check the SMART Status line to check hard drive health or SSD health.
If it says Verified, your drive is healthy.
If it says Failing, your hardware is failing and needs to be replaced.
How to Check Hard Drive Health on Linux?
Every major operating system, including Linux, comes equipped with built-in diagnostic tools made to scan your storage system. Linux use cases are extreme, such as development, hosting, and data management, where a corrupted storage sector can easily ruin active projects. So, here is how to check hard drive health on Linux:
Using Command Line (fsck)
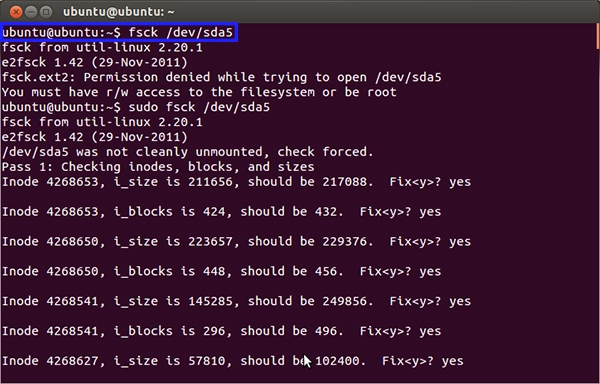
The Linux FSCK (File System Consistency Check) command is a built-in terminal utility designed to scan and repair errors within your hard drive’s file system. Running this tool regularly keeps your Linux distribution running smoothly and makes sure your files are uncorrupted. It checks for errors, data structures, bad blocks, and incorrect metadata.
Steps to check and repair Linux storage using FSCK:
Open your terminal by pressing Ctrl + Alt + T.
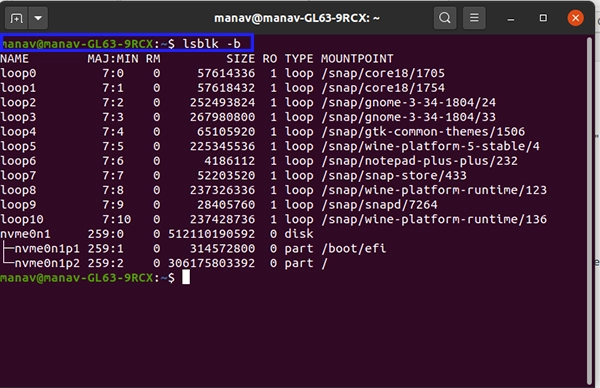
Run the following command to identify the path of the drive partition you want to inspect:
lsblk
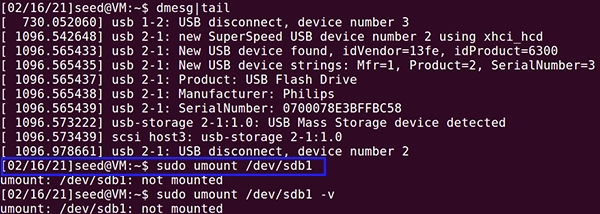
Note: You must never run FSCK on a file system that is currently mounted or active; doing so can permanently destroy your data. If you are scanning an external or secondary drive, unmount it first with this command:
sudo unmount /dev/sdaX
Run the repair command on your selected partition (replace X with your drive letter, example, sda, sdb):
sudo fsck -r /dev/sdX
(The -r flag tells the terminal to ask for your permission before making any changes.)
Review the on-screen prompts and type Y (Yes) to let the system repair any file placement errors it encounters.
Once the terminal reports that the filesystem is clean, type reboot to safely restart your system.
Conclusion
Regularly monitoring your hard drive health is the best way to avoid sudden data loss and unexpected system crashes. By taking a few minutes to use the built-in diagnostic features of Windows, macOS, and Linux, you can catch critical errors before they turn into hardware failures.
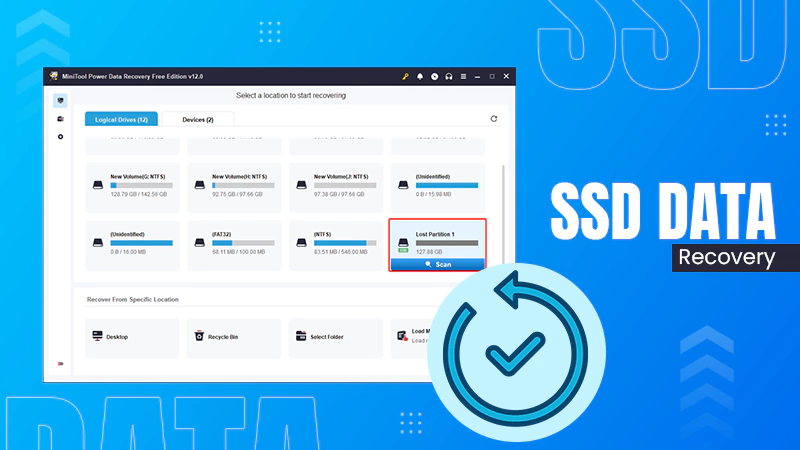
If your tools show any warning signs like failing SMART status or unrepairable bad sectors, remember to back up your files to a secure place or recover data using reliabledata recovery software so that at least you have your data in your hands.
Remember to regularly check hard drive health using these trusted, no-risk methods to keep your computer running fast and keep your drive data completely safe.
Frequently Asked Questions
How to check hard drive health?
You can check hard drive health for free using built-in tools. On Windows, check the storage properties in Settings or run a SMART query via Command Prompt. For macOS, use the native Disk Utility application to read your drive’s status. On Linux, use command-line tools like fsck.
How to run a diagnostic on a hard drive?
To run a hardware diagnostic, Windows users can run CHKDSK via the Command Prompt or use the Error Checking tool in the File Explorer properties. Mac users have Disk Utility’s First Aid to safely scan and fix logical drive errors.
How do I run CHKDSK?
To run CHKDSK, follow these steps:
Open Command Prompt with administrative permissions.
Type chkdsk C: /f /r /x and press Enter. (Replace C: with your drive letter)
If scanning your main system drive, type Y to schedule the check, then restart your PC to let the tool scan and fix errors.
How to tell if a hard drive is failing?
A failing hard drive shows obvious warning signs. A failing hard drive shows signs such as performance drops, system crashes, and files randomly getting corrupted or being missing. Also, if a drive is physically affected, you might hear clicking or grinding sounds coming from the drive.
How to check hard drive health on Linux?
You can check hard drive health on Linux by opening your terminal and using the built-in FSCK (File System Consistency Check) tool.
Open a terminal window on your Linux system.
Run lsblk to locate your target drive partition.
Unmount the drive safely using sudo umount.
Then run sudo fsck -r /dev/sda1 to scan and repair your drive.
Can I do an SSD health check on a Mac?
Of course, you can run an SSD health check on a Mac using the built-in Disk Utility app.
Go to Applications > Utilities > Disk Utility.
Click View and select Show All Devices.
Click your root storage to view its S.M.A.R.T. Status at the bottom.
What is the best hard drive diagnostic tool for Windows 11?
The best hard drive diagnostic tools that Windows offers are the Error Checking tool and the CHKDSK utility. Access the Error Checking tool by right-clicking your drive in File Explorer, selecting Properties, and clicking Check under the Tools tab. For a deeper repair scan, run the CHKDSK command (chkdsk C: /f /r /x) in Command Prompt.